Hair Transplant Turkey Cost Explained (2026)
July 25, 2026
Hair Transplant in Istanbul vs Other Turkish Cities
July 26, 2026
Hair Transplant Guide 2026
Hair Transplant Turkey Before and After: Real Results, Timeline & Expectations
One of the first questions patients ask before booking a hair transplant in Turkey is:
“What will my hair look like after the procedure?”
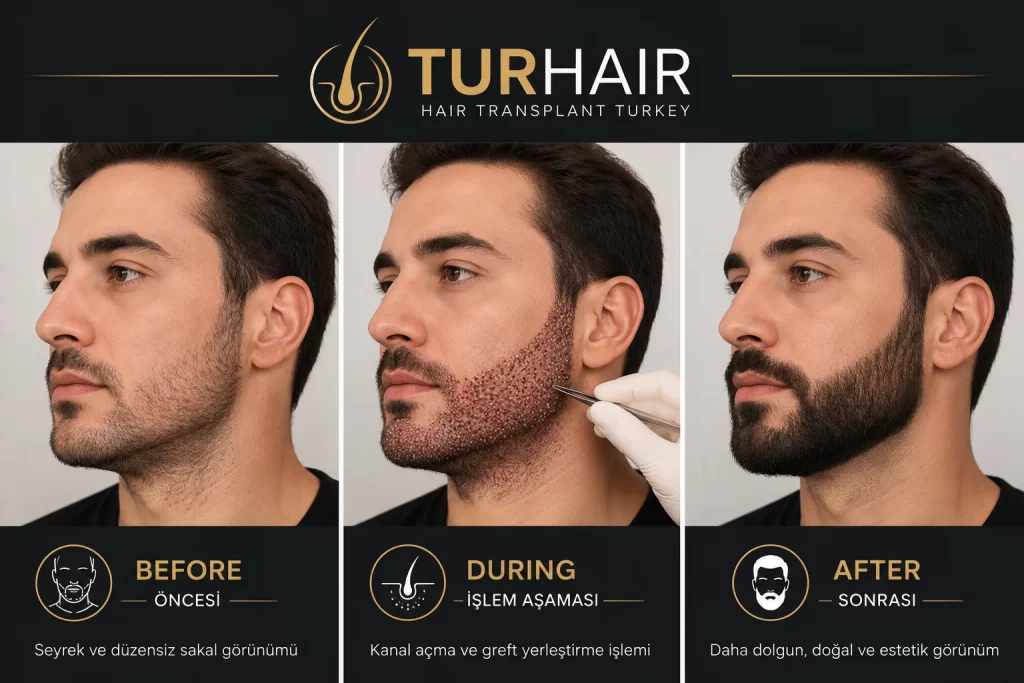
Before-and-after photos are one of the most powerful ways to evaluate a clinic, but they should always be interpreted correctly. A successful hair transplant is not simply about having more hair—it is about creating a natural-looking hairline, achieving balanced density, protecting the donor area, and delivering results that continue to look good for years.
Turkey has become the world’s leading destination for hair transplantation thanks to experienced doctors, advanced FUE techniques, modern hospitals, and affordable prices. Every year, thousands of international patients travel to Istanbul to restore their hair and confidence.
Quick Answer
What Results Can You Expect From a Hair Transplant in Turkey?
A hair transplant in Turkey can provide permanent, natural-looking hair restoration when healthy donor follicles are transplanted by an experienced medical team. New growth usually begins after 3 to 4 months, visible improvement appears around 6 months, and most frontal results mature after approximately 12 months. Crown areas may require 15 to 18 months.
Hair Transplant Turkey Before and After Timeline
- First 10 days: Redness and scabs gradually disappear.
- Weeks 2–8: Temporary shedding of transplanted hairs is common.
- Months 3–4: Early new hair growth begins.
- Month 6: Noticeable improvement in coverage and hairline appearance.
- Months 9–12: Hair becomes thicker, stronger, and easier to style.
- Months 12–18: Final maturation, especially in the crown area.
The TurHair Difference
Why Choose TurHair for a Hair Transplant in Turkey?
Choosing a hair transplant clinic should involve more than comparing prices, hotel packages, or advertised graft numbers. The final appearance depends on medical assessment, hairline planning, donor-area management, channel creation, graft handling, and long-term follow-up.
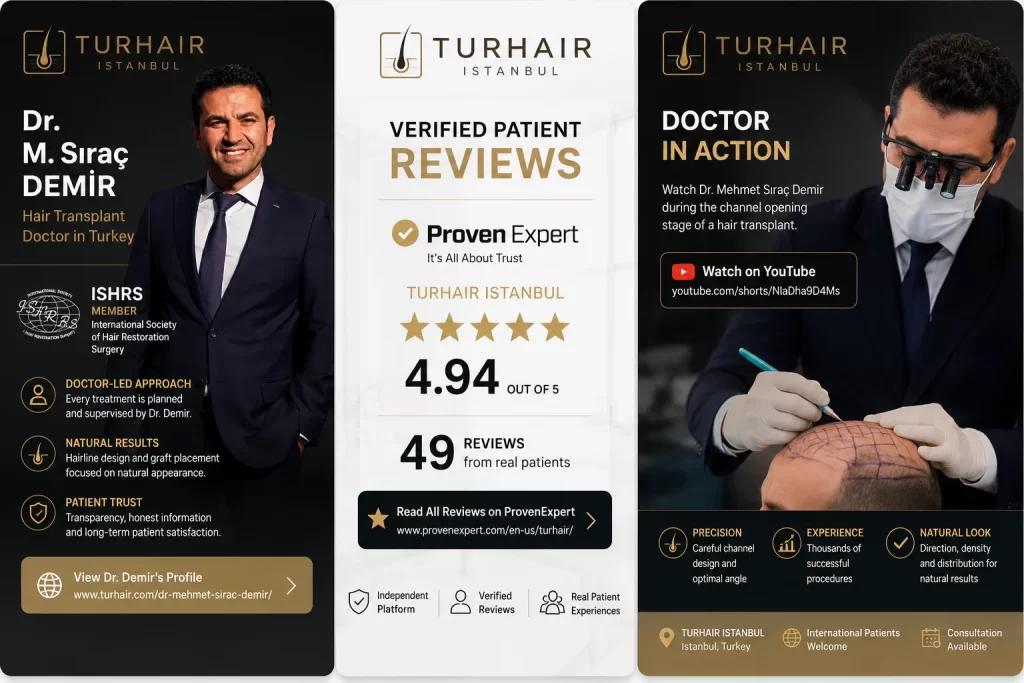
TurHair follows a doctor-led and individually planned approach. Instead of treating every patient with the same standard template, the treatment plan is adapted to the patient’s facial structure, donor capacity, hair-loss pattern, age, hair characteristics, and possible future progression.
The comparison describes possible differences between individualized doctor-led care and high-volume treatment models. Services and medical involvement may vary between clinics.
Personalized Graft Strategy
The graft target is determined after reviewing the donor area and treatment priorities. A responsible plan may sometimes recommend fewer grafts to protect future options.
Natural Growth Direction
Recipient channels are planned around the natural direction and angle of surrounding hair, helping the result blend more smoothly and remain easier to style.
Clear Patient Communication
The patient is informed about realistic density, expected growth stages, donor limitations, healing, temporary shedding, and the approximate maturation timeline.
Why Doctor-Led Channel Opening Matters
In FUE and Sapphire FUE procedures, recipient channels influence where the grafts will sit and how the transplanted hair will emerge. Their position, depth, angle, and orientation can affect visual density, natural direction, and the overall character of the hairline.
For patients selecting TurHair’s VIP approach, Dr. Mehmet Sıraç Demir personally performs this critical stage. This allows the implantation plan to follow the medical assessment and hairline design established before surgery.
TurHair Is Designed for Patients Who Value:
- Doctor-led medical planning
- Individual hairline design
- Responsible donor-area preservation
- Limited daily patient volume
- Technique selection based on suitability
- International patient assistance
- Structured post-operative guidance
- Natural-looking and age-appropriate restoration
A Hair Transplant Should Be Planned for the Future, Not Only for the First Photo
TurHair’s objective is to create a medically considered treatment plan that improves the patient’s appearance while respecting donor capacity, natural anatomy, and possible future hair loss.
What Makes a Great Before and After Result?
Many patients only compare the final photographs. However, experienced hair restoration surgeons evaluate many more factors than simply “more hair.”
| Factor | Why It Matters |
|---|---|
| Natural Hairline | Designed according to age and facial proportions. |
| Proper Density | Even distribution without artificial-looking clusters. |
| Healthy Donor Area | No visible overharvesting or patchy appearance. |
| Correct Hair Direction | Hair grows naturally following existing angles. |
| Long-Term Planning | Future hair loss is considered during design. |
Excellent before-and-after transformations are created through careful planning rather than simply transplanting the highest possible number of grafts.
Hair Transplant Timeline: Before and After Month by Month
Hair restoration is a gradual biological process. Understanding the timeline helps patients maintain realistic expectations.
| Time | What Happens |
|---|---|
| Day 1 | Fresh graft placement with tiny scabs. |
| Week 2 | Scabs disappear and healing progresses. |
| Month 1 | Temporary shedding begins (shock loss). |
| Month 3 | Early new hair starts appearing. |
| Month 6 | Around 60–70% of final density becomes visible. |
| Month 9 | Hair becomes thicker and more mature. |
| Month 12 | Most patients achieve their final result. |
| Month 15-18 | Maximum maturation for crown procedures. |
Why Turkey Produces Outstanding Before and After Results
Turkey performs one of the highest numbers of hair transplant procedures worldwide. High surgical volume allows experienced doctors to refine their techniques continuously.
- Experienced hair transplant specialists
- Modern Sapphire FUE and DHI techniques
- Internationally accredited hospitals
- Affordable pricing without compromising quality
- Thousands of international success stories
- Advanced post-operative follow-up
However, results depend far more on choosing the right doctor than simply choosing the right country.
Common Before and After Mistakes
Not every dramatic transformation represents quality surgery.
| Red Flag | Why It’s Risky |
|---|---|
| Artificial straight hairline | Looks unnatural with age. |
| Extremely dense front only | May exhaust donor reserves. |
| No donor photos | Could hide donor damage. |
| Only immediate post-op photos | Final results are unknown. |
| Heavy editing or filters | May exaggerate outcomes. |
What Influences Final Results?
Every patient heals differently. Several biological factors determine the final appearance.
- Age
- Hair thickness
- Hair color
- Hair curl
- Donor quality
- Severity of hair loss
- Smoking habits
- Medical conditions
- Post-operative care
- Surgeon’s experience
Patients with thick, slightly wavy hair often achieve greater visual density than patients with very fine straight hair, even when the same number of grafts is transplanted.
Doctor-Led Surgery Makes the Difference
Many clinics advertise impressive before-and-after galleries, but patients should verify who actually performed the surgery.
Doctor-led procedures generally provide more consistent hairline design, accurate graft placement, better donor preservation, and more natural long-term outcomes compared to technician-only clinics.
How to Evaluate Before and After Photos Correctly
- Look for 12-month results.
- Check donor area photos.
- Compare multiple lighting conditions.
- Review crown and hairline separately.
- Ask for videos, not only photographs.
- Look for patients with similar hair loss.
- Check consistency across dozens of cases.
Final Thoughts
Hair transplant before-and-after photos can be extremely helpful—but only when viewed critically. Focus on naturalness, donor preservation, realistic density, and long-term planning instead of dramatic marketing images.
The best clinics in Turkey combine experienced doctors, ethical patient selection, modern FUE techniques, and personalized treatment plans to achieve natural results that continue improving over the course of 12 to 18 months.
Key Takeaways
- ✔ Final results usually appear after 12 months.
- ✔ Natural hairline design is more important than maximum density.
- ✔ Always evaluate the donor area.
- ✔ Doctor-led procedures typically produce more consistent outcomes.
- ✔ Choose clinics with genuine long-term before-and-after documentation.
Hair Transplant Turkey Before and After Results by Hair Loss Type
Hair transplant before-and-after results can vary significantly depending on the patient’s pattern of hair loss, donor-area quality, hair characteristics, age, and long-term expectations. Two patients may receive the same number of grafts but achieve a very different visual outcome. This is why every hair transplant in Turkey should begin with a personalized medical assessment rather than a standard graft estimate.
The Norwood scale is commonly used to classify male pattern hair loss. It helps doctors understand the severity of hair loss and create a realistic surgical plan. Patients with early-stage hair loss usually require fewer grafts, while advanced cases may need a larger session or more than one procedure.
Norwood 2 Hair Transplant Before and After
Norwood 2 usually involves mild recession around the temples and the beginning of an M-shaped hairline. This is often one of the most suitable stages for a conservative hair transplant, especially when hair loss has become relatively stable.
A typical Norwood 2 procedure may require approximately 1,200 to 2,000 grafts, depending on the desired hairline position and temple restoration. The goal should not be to create an unnaturally low teenage hairline. Instead, the doctor should design a mature, age-appropriate hairline that complements the patient’s face and preserves enough donor grafts for the future.
Before-and-after results in Norwood 2 patients can appear highly impressive because the treatment area is relatively small. When single-hair grafts are carefully placed along the front edge and denser grafts are positioned behind them, the transition can look extremely natural.
Norwood 3 Hair Transplant Before and After
Norwood 3 is one of the most common patterns treated in Turkish hair transplant clinics. The frontal corners have usually receded more deeply, and the central hairline may also appear thinner.
Most Norwood 3 cases require approximately 2,000 to 3,000 grafts. The exact number depends on the size of the frontal area, the presence of diffuse thinning, and whether the temples require reconstruction.
A successful before-and-after result should restore the frame of the face without placing excessive density in one small area. The surgeon must consider future hair loss behind the transplanted zone. If the existing hair continues to thin, an overly aggressive front line may later look disconnected.
Important: A natural result depends not only on graft quantity but also on hairline shape, graft direction, angle, distribution, and long-term planning.
Norwood 4 Hair Transplant Before and After
Norwood 4 patients generally have more extensive frontal hair loss and may also show thinning or baldness in the crown. The frontal zone and crown are often separated by a band of existing hair.
These patients may require between 3,000 and 4,000 grafts, although donor capacity must always be evaluated carefully. In many cases, the frontal area receives priority because restoring the hairline and frontal density creates the strongest visual improvement.
The crown may require a separate strategy. A large number of grafts can be consumed by the natural spiral pattern of the crown. For this reason, doctors sometimes recommend moderate crown coverage rather than attempting extremely high density.
Before-and-after photographs should clearly show the frontal zone, top view, crown, side angles, and donor area. A single front-facing photo is not enough to judge the overall success of a Norwood 4 procedure.
Norwood 5 Hair Transplant Before and After
Norwood 5 hair loss involves a larger bald area extending from the frontal region toward the crown. The remaining bridge of hair between the two areas is usually thin or narrow.
A typical treatment plan may involve approximately 3,500 to 4,500 grafts. However, the safest number depends on the patient’s donor density, scalp elasticity, hair thickness, and previous procedures.
The main objective is usually to create a natural frontal appearance and provide balanced coverage across the mid-scalp. Complete high-density coverage of every bald area may not be realistic in a single operation.
Patients with thick or curly hair often achieve stronger visual coverage because each hair creates more volume. Fine and straight hair usually requires more careful distribution to reduce the appearance of scalp visibility.
Norwood 6 and 7 Hair Transplant Before and After
Norwood 6 and Norwood 7 represent advanced hair loss. In these cases, the frontal, mid-scalp, and crown areas may be connected into one large bald region.
These patients require particularly realistic planning. Even a strong donor area has a limited number of safe grafts. Attempting to cover the entire scalp at maximum density may lead to donor overharvesting and an unnatural result.
A skilled doctor may recommend focusing on the frontal hairline and mid-scalp, where the cosmetic impact is greatest. The crown may receive lighter coverage or be treated during a second operation.
In selected cases, beard grafts can support the scalp donor supply. Beard hair is generally thicker and may improve visual density in the mid-scalp or crown. However, beard grafts should usually not be used to create the delicate front edge of the hairline.
| Hair Loss Stage | Estimated Graft Range | Main Treatment Area |
|---|---|---|
| Norwood 2 | 1,200–2,000 grafts | Hairline and temples |
| Norwood 3 | 2,000–3,000 grafts | Front and temple recession |
| Norwood 4 | 3,000–4,000 grafts | Front, mid-scalp and possible crown |
| Norwood 5 | 3,500–4,500 grafts | Front and mid-scalp priority |
| Norwood 6–7 | 4,000+ grafts when suitable | Strategic frontal and mid-scalp coverage |
Graft ranges are general estimates only. A medical consultation and donor-area analysis are required to determine an appropriate treatment plan.
Hairline Before and After: Why Design Is So Important
The hairline is the most visible part of a hair transplant result. Even excellent density can look unnatural if the hairline is too straight, too low, or poorly matched to the patient’s facial structure.
Natural hairlines contain subtle irregularities. They are not created as perfectly symmetrical lines. The front edge should generally include carefully selected single-hair follicular units, while double and triple grafts are placed farther behind to build density.
The direction and angle of every graft also matter. Hair in the frontal region normally grows forward at a low angle, while temple hair follows a different direction. Incorrect graft placement can make the hair appear upright, plug-like, or difficult to style.
A professional before-and-after gallery should include close-up photographs of the hairline. These images allow patients to examine softness, density transitions, temple design, and the absence of visible rows.
Crown Hair Transplant Before and After
Crown restoration is technically demanding because the hair grows in a circular or spiral pattern. The crown can also consume a high number of grafts while producing less dramatic visual improvement than the frontal area.
Crown growth may take longer than frontal growth. Some patients notice substantial improvement after 9 to 12 months, while full maturation may continue for 15 to 18 months.
A good crown result does not necessarily mean complete scalp invisibility under every light. The objective is usually to reduce the bald appearance and create a natural pattern that blends with surrounding hair.
Donor Area Before and After Hair Transplant
Patients often focus entirely on the recipient area, but the donor zone is equally important. The donor area is the permanent hair supply located mainly at the back and sides of the scalp.
A properly managed donor area should heal evenly without visible gaps, excessive thinning, or patchy overharvesting. Removing too many grafts from one area can create a moth-eaten appearance that may become more noticeable with short hairstyles.
When reviewing hair transplant Turkey before-and-after photos, patients should always request images of the back and sides of the head. Clinics that only display the new hairline may not be showing the full surgical outcome.
Can Before and After Results Be Guaranteed?
No ethical clinic can guarantee an exact density, graft survival percentage, or appearance. Hair transplantation is a medical procedure, and healing varies between individuals.
A reputable clinic can provide a realistic treatment plan, explain expected coverage, use established surgical protocols, and offer long-term follow-up. However, final growth is also influenced by circulation, genetics, scalp health, smoking, medication use, post-operative care, and individual biology.
Choose Evidence, Not Marketing
The most reliable hair transplant before-and-after results are supported by consistent lighting, multiple angles, clear timelines, donor photographs, video evidence, and cases involving patients with similar hair characteristics and hair loss patterns.
Hair Transplant Turkey Before and After Results by Hair Loss Type
Hair transplant before-and-after results can vary significantly depending on the patient’s pattern of hair loss, donor-area quality, hair characteristics, age, and long-term expectations. Two patients may receive the same number of grafts but achieve a very different visual outcome. This is why every hair transplant in Turkey should begin with a personalized medical assessment rather than a standard graft estimate.
The Norwood scale is commonly used to classify male pattern hair loss. It helps doctors understand the severity of hair loss and create a realistic surgical plan. Patients with early-stage hair loss usually require fewer grafts, while advanced cases may need a larger session or more than one procedure.
Norwood 2 Hair Transplant Before and After
Norwood 2 usually involves mild recession around the temples and the beginning of an M-shaped hairline. This is often one of the most suitable stages for a conservative hair transplant, especially when hair loss has become relatively stable.
A typical Norwood 2 procedure may require approximately 1,200 to 2,000 grafts, depending on the desired hairline position and temple restoration. The goal should not be to create an unnaturally low teenage hairline. Instead, the doctor should design a mature, age-appropriate hairline that complements the patient’s face and preserves enough donor grafts for the future.
Before-and-after results in Norwood 2 patients can appear highly impressive because the treatment area is relatively small. When single-hair grafts are carefully placed along the front edge and denser grafts are positioned behind them, the transition can look extremely natural.
Norwood 3 Hair Transplant Before and After
Norwood 3 is one of the most common patterns treated in Turkish hair transplant clinics. The frontal corners have usually receded more deeply, and the central hairline may also appear thinner.
Most Norwood 3 cases require approximately 2,000 to 3,000 grafts. The exact number depends on the size of the frontal area, the presence of diffuse thinning, and whether the temples require reconstruction.
A successful before-and-after result should restore the frame of the face without placing excessive density in one small area. The surgeon must consider future hair loss behind the transplanted zone. If the existing hair continues to thin, an overly aggressive front line may later look disconnected.
Important: A natural result depends not only on graft quantity but also on hairline shape, graft direction, angle, distribution, and long-term planning.
Norwood 4 Hair Transplant Before and After
Norwood 4 patients generally have more extensive frontal hair loss and may also show thinning or baldness in the crown. The frontal zone and crown are often separated by a band of existing hair.
These patients may require between 3,000 and 4,000 grafts, although donor capacity must always be evaluated carefully. In many cases, the frontal area receives priority because restoring the hairline and frontal density creates the strongest visual improvement.
The crown may require a separate strategy. A large number of grafts can be consumed by the natural spiral pattern of the crown. For this reason, doctors sometimes recommend moderate crown coverage rather than attempting extremely high density.
Before-and-after photographs should clearly show the frontal zone, top view, crown, side angles, and donor area. A single front-facing photo is not enough to judge the overall success of a Norwood 4 procedure.
Norwood 5 Hair Transplant Before and After
Norwood 5 hair loss involves a larger bald area extending from the frontal region toward the crown. The remaining bridge of hair between the two areas is usually thin or narrow.
A typical treatment plan may involve approximately 3,500 to 4,500 grafts. However, the safest number depends on the patient’s donor density, scalp elasticity, hair thickness, and previous procedures.
The main objective is usually to create a natural frontal appearance and provide balanced coverage across the mid-scalp. Complete high-density coverage of every bald area may not be realistic in a single operation.
Patients with thick or curly hair often achieve stronger visual coverage because each hair creates more volume. Fine and straight hair usually requires more careful distribution to reduce the appearance of scalp visibility.
Norwood 6 and 7 Hair Transplant Before and After
Norwood 6 and Norwood 7 represent advanced hair loss. In these cases, the frontal, mid-scalp, and crown areas may be connected into one large bald region.
These patients require particularly realistic planning. Even a strong donor area has a limited number of safe grafts. Attempting to cover the entire scalp at maximum density may lead to donor overharvesting and an unnatural result.
A skilled doctor may recommend focusing on the frontal hairline and mid-scalp, where the cosmetic impact is greatest. The crown may receive lighter coverage or be treated during a second operation.
In selected cases, beard grafts can support the scalp donor supply. Beard hair is generally thicker and may improve visual density in the mid-scalp or crown. However, beard grafts should usually not be used to create the delicate front edge of the hairline.
| Hair Loss Stage | Estimated Graft Range | Main Treatment Area |
|---|---|---|
| Norwood 2 | 1,200–2,000 grafts | Hairline and temples |
| Norwood 3 | 2,000–3,000 grafts | Front and temple recession |
| Norwood 4 | 3,000–4,000 grafts | Front, mid-scalp and possible crown |
| Norwood 5 | 3,500–4,500 grafts | Front and mid-scalp priority |
| Norwood 6–7 | 4,000+ grafts when suitable | Strategic frontal and mid-scalp coverage |
Graft ranges are general estimates only. A medical consultation and donor-area analysis are required to determine an appropriate treatment plan.
Hairline Before and After: Why Design Is So Important
The hairline is the most visible part of a hair transplant result. Even excellent density can look unnatural if the hairline is too straight, too low, or poorly matched to the patient’s facial structure.
Natural hairlines contain subtle irregularities. They are not created as perfectly symmetrical lines. The front edge should generally include carefully selected single-hair follicular units, while double and triple grafts are placed farther behind to build density.
The direction and angle of every graft also matter. Hair in the frontal region normally grows forward at a low angle, while temple hair follows a different direction. Incorrect graft placement can make the hair appear upright, plug-like, or difficult to style.
A professional before-and-after gallery should include close-up photographs of the hairline. These images allow patients to examine softness, density transitions, temple design, and the absence of visible rows.
Crown Hair Transplant Before and After
Crown restoration is technically demanding because the hair grows in a circular or spiral pattern. The crown can also consume a high number of grafts while producing less dramatic visual improvement than the frontal area.
Crown growth may take longer than frontal growth. Some patients notice substantial improvement after 9 to 12 months, while full maturation may continue for 15 to 18 months.
A good crown result does not necessarily mean complete scalp invisibility under every light. The objective is usually to reduce the bald appearance and create a natural pattern that blends with surrounding hair.
Donor Area Before and After Hair Transplant
Patients often focus entirely on the recipient area, but the donor zone is equally important. The donor area is the permanent hair supply located mainly at the back and sides of the scalp.
A properly managed donor area should heal evenly without visible gaps, excessive thinning, or patchy overharvesting. Removing too many grafts from one area can create a moth-eaten appearance that may become more noticeable with short hairstyles.
When reviewing hair transplant Turkey before-and-after photos, patients should always request images of the back and sides of the head. Clinics that only display the new hairline may not be showing the full surgical outcome.
Can Before and After Results Be Guaranteed?
No ethical clinic can guarantee an exact density, graft survival percentage, or appearance. Hair transplantation is a medical procedure, and healing varies between individuals.
A reputable clinic can provide a realistic treatment plan, explain expected coverage, use established surgical protocols, and offer long-term follow-up. However, final growth is also influenced by circulation, genetics, scalp health, smoking, medication use, post-operative care, and individual biology.
Choose Evidence, Not Marketing
The most reliable hair transplant before-and-after results are supported by consistent lighting, multiple angles, clear timelines, donor photographs, video evidence, and cases involving patients with similar hair characteristics and hair loss patterns.
How to Compare Hair Transplant Turkey Before and After Photos Safely
Before-and-after galleries are one of the most important tools for patients considering a hair transplant in Turkey. However, photographs can only be useful when they are genuine, clearly documented, and presented in a way that allows a fair comparison. Patients should avoid choosing a clinic based on one dramatic transformation or one heavily edited social media post.
A reliable gallery should include different hair-loss patterns, different hair types, various graft numbers, multiple angles, and results photographed at clearly stated stages such as 6 months, 9 months, 12 months, or 18 months. This makes it easier to understand what the clinic can achieve consistently rather than what may have occurred in one unusually favorable case.
Check Whether the Lighting Is Consistent
Lighting can completely change how hair density appears. Soft indoor lighting reduces scalp reflection and may make thin hair look denser. Strong overhead lighting or direct sunlight can reveal more scalp, especially in patients with fine hair or a high contrast between hair and skin color.
For a fair comparison, before-and-after photographs should ideally be taken in similar lighting conditions. If the before photo is taken under harsh light and the after photo is taken in a darker room, the result may appear more dramatic than it really is.
Patients should also look for images that show both normal room lighting and brighter conditions. A trustworthy clinic should not be afraid to display realistic results from several environments.
Compare the Same Hair Length and Styling
Hair length has a major effect on visual coverage. Longer hair overlaps the scalp and can create the appearance of greater density. Short hair, on the other hand, may expose more space between follicular units.
Styling products can also change the result. Hair fibers, wet-look products, volumizing powder, blow-drying, and strategic combing may make the transplanted area appear fuller. Before-and-after photographs are easier to evaluate when the hair is presented in a similar style and length.
A credible result should remain natural even without heavy styling. Clinics that provide videos of the hair being combed in different directions offer stronger evidence than clinics that only display one fixed hairstyle.
Look for Clear Month-by-Month Labels
Patients should always know when the after photo was taken. A 6-month result should not be presented as a final result because the hair may continue thickening for several more months. Similarly, immediate post-operative photos only show graft placement, not long-term growth.
The most useful timeline includes several stages. For example, a clinic may show the patient before surgery, immediately after the procedure, at 10 days, 3 months, 6 months, 9 months, and 12 months.
This type of documentation helps patients understand that growth is gradual. It also reduces unnecessary anxiety during the shedding phase when transplanted hairs temporarily fall out.
| Photo Stage | What It Can Show | What It Cannot Prove |
|---|---|---|
| Immediately After Surgery | Hairline design and graft distribution | Final density or graft survival |
| 3 Months | Early growth and recovery progress | Mature thickness or final coverage |
| 6 Months | Meaningful early transformation | Complete final result |
| 12 Months | Most frontal results near maturity | Full crown maturation in every case |
| 15–18 Months | Late crown growth and final maturation | Future progression of untreated hair loss |
Questions to Ask Before Choosing a Clinic
A hair transplant is a medical procedure, so patients should ask detailed questions before making a decision. Price and package details are important, but they should not be the only factors considered.
The clinic should explain who will perform each stage of the procedure. Patients should know who designs the hairline, who extracts the grafts, who opens the recipient channels, and who implants the follicles.
It is also important to ask how many patients are treated each day. Clinics that perform a very high number of surgeries may divide responsibilities among several teams. This does not automatically mean poor quality, but patients should understand who will be responsible for their operation.
Recommended question: “Can you show before-and-after results from patients with a similar hair-loss pattern, donor density, hair type, and graft requirement?”
Who Designs the Hairline?
Hairline design has a major effect on the final result. It should be based on facial proportions, age, forehead shape, existing hair, donor capacity, and the possibility of future hair loss.
Patients should avoid clinics that use the same low, straight hairline for every patient. A natural hairline should be individualized and should contain controlled irregularities that imitate normal growth.
Who Opens the Channels?
Channel opening is one of the most important stages of FUE and Sapphire FUE. The angle, direction, depth, and distribution of the channels influence how the transplanted hair will grow.
Incorrect channel direction may create an unnatural appearance or make the hair difficult to style. Patients should ask whether this stage is performed by the doctor or by another member of the surgical team.
How Is the Donor Area Protected?
The donor area contains a limited number of permanent follicles. These grafts cannot be replaced once removed. This is why donor management should be conservative and carefully planned.
A reputable clinic should explain the safe donor zone, the estimated available graft capacity, and how extraction points will be distributed. Patients with advanced hair loss may need to preserve grafts for future procedures.
Before-and-after evaluation should always include the donor area. A full recipient area result should not be considered successful if the back of the scalp has been visibly damaged.
Hair Transplant Before and After for Younger Patients
Younger patients are often highly motivated to restore a receding hairline, but they require careful long-term planning. Hair loss may continue for many years, and a hairline that looks appropriate at age 22 may become difficult to maintain later.
A conservative design can reduce the risk of an unnatural appearance if the surrounding native hair continues to thin. The doctor may also discuss medical treatments that can help stabilize ongoing hair loss.
Before-and-after results in younger patients may look excellent in the first few years, but the real test is whether the design remains natural as the patient ages. This is why preserving the donor area is especially important.
Hair Transplant Before and After for Older Patients
Older patients can also achieve strong hair transplant results if their general health, scalp condition, and donor area are suitable. In many cases, the hair-loss pattern is more stable, which may make long-term planning easier.
The hairline should still be age-appropriate. A mature, slightly higher hairline often looks more natural than an aggressive low design. The main objective may be facial framing, improved coverage, and easier styling rather than maximum density.
Patients with white or gray hair may achieve a soft, natural appearance because the contrast between hair and scalp is often lower. However, individual density and hair-shaft thickness still influence the final outcome.
Can a Second Hair Transplant Improve the Result?
Some patients choose a second procedure to increase density, restore the crown, repair an old hairline, or address continued hair loss. A second operation can be successful, but the remaining donor capacity must be evaluated carefully.
The doctor should review the first procedure, examine extraction patterns, assess scar tissue, and determine whether the donor area can safely support additional grafts.
Patients should not assume that every area can be made infinitely dense through repeated surgery. The donor supply is limited, and each procedure must fit into a long-term strategy.
Repair Hair Transplant Before and After
Repair procedures may be performed for unnatural hairlines, plug-like grafts, incorrect direction, low density, visible scars, or donor overharvesting. These cases are often more complex than first-time procedures.
A repair plan may involve removing or redistributing poorly placed grafts, softening the front edge with single-hair follicles, adding density behind the hairline, or using scalp micropigmentation to reduce visible donor contrast.
Patients considering repair surgery should look for before-and-after cases involving similar problems. General successful cases do not necessarily prove that a clinic has experience with corrective work.
How Post-Operative Care Affects Before and After Results
The surgical procedure is only the beginning of the hair restoration process. Proper aftercare protects the newly implanted grafts and supports healthy healing.
Patients should follow the clinic’s instructions regarding sleeping position, washing, medication, physical activity, sun exposure, smoking, alcohol, and the use of hats.
The first wash is especially important because it helps remove dried blood and begins the gradual scab-removal process. Patients should avoid scratching, rubbing, or using strong water pressure during the early recovery period.
Heavy exercise, swimming, sauna use, and direct sun exposure may need to be avoided temporarily. Returning to these activities too early can increase irritation, swelling, or trauma to the recipient area.
| Aftercare Factor | Why It Matters |
|---|---|
| Gentle washing | Supports healing and controlled scab removal |
| Sun protection | Helps reduce irritation and discoloration |
| Avoiding smoking | Supports circulation and tissue recovery |
| Following medication instructions | Helps manage discomfort, swelling, and infection risk |
| Long-term follow-up | Allows progress to be monitored month by month |
Realistic Expectations Create Better Satisfaction
A successful hair transplant can significantly improve appearance and confidence, but it cannot recreate unlimited natural density. The best results are based on realistic goals, careful planning, and honest communication.
Patients should understand which areas will receive priority, how much coverage can be expected, whether the crown can be treated in the same session, and whether future surgery may be necessary.
The most trustworthy hair transplant Turkey before-and-after results are not always the most dramatic. They are the results that look natural, protect the donor area, match the patient’s age and face, and continue to look appropriate over time.
Final Evaluation Checklist
- Compare the same lighting and camera angles.
- Check hair length, styling, and scalp visibility.
- Review 12-month results whenever possible.
- Ask to see the donor area.
- Look for video evidence and multiple views.
- Choose cases with similar hair-loss characteristics.
- Confirm who performs the key surgical stages.
- Prioritize long-term planning over maximum graft numbers.
“`html
Frequently Asked Questions
Hair Transplant Turkey Before and After FAQ
Find clear answers about hair transplant results in Turkey, recovery stages, graft numbers, FUE and DHI techniques, donor-area healing, hair growth, and realistic before-and-after expectations.
Related Hair Transplant Guides
Learn More About Hair Transplant Results in Turkey
Explore these related TurHair guides to learn more about hair transplant safety, recovery, international travel, clinic selection, treatment costs and natural before-and-after results.
Planning a hair transplant in Turkey?
Compare real results, medical involvement, donor protection and long-term aftercare before choosing a clinic.